Stat Counter

Sunday, December 26, 2010

Christmas Brunch

For Christmas Brunch, Leigh Ann and I were determined to do something other than the usual bread, meat and egg casserole. However, after an exhaustive search and deliberation process, we settled on a new twist of the old casserole because (a) it easily feeds a crowd (b) it's easy to transport on Christmas morning (c) it can be made in advance (d) everybody likes it.

We were pretty delighted with what we had, a cheesy apple bacon strata. The recipe came from my friend DeAnna, who scanned it from Celebration of Seasons from the Dallas Jr. League. The apple and bacon made it just a bit different from the ham or sausage varieties we've had before, but it was easy to assemble on Christmas Eve and bake on Christmas morning.
Cheesy Apple Bacon Strata
3 tablespoons butter or margarine
3 medium Granny Smith apples, peeled and coarsely chopped (3 cups)
3 tablespoons brown sugar
4 cups cubed firm bread (7 slices)
1 pound bacon, crisp-cooked and crumbled
2 cups (8 ounces) shredded sharp Cheddar cheese
2 1/2 cups milk
5 eggs
1 tablespoon dry mustard
2 teaspoons Worcestershire sauce
1/4 teaspoon salt
1/8 teaspoon pepper

Melt the butter in a 10-inch skillet over medium heat. Add the apples, cook for 2 to 3 minutes or until tender-crisp, stirring occasionally. Stir in the brown sugar. Reduce the heat to low. Cook for 5 to 6 minutes or until the apples are tender, stirring occasionally.
Layer the bread, bacon, apple mixture and cheese 1/2 at a time in a greased 2-quart baking dish. Combine the milk, eggs, dry mustard, Worcestershire sauce, Salt and pepper in a bowl and mix well. Pour over the layers.
Chill, tightly covered for 2 to 24 hours.

Preheat the oven to 350 degrees. Bake, uncovered, for 40 to 45 minutes or until a knife inserted in the center comes out clean. Let stand for 10 minutes before serving. Serves 12.
I seeded two pomegranates, and Mom cut up a bunch of oranges for a spinach salad with pecans and walnut oil vinaigrette.
Roasted asparagus and some amazing cheese grits (recipe to come soon, I hope!) joined my sister's homemade scones (three different flavors) to make a lovely plate and a wonderful meal.  
With my aunt and uncle here from Tallahassee, Mom in from Quincy, and some church friends who feel like family, it was a very merry Christmas indeed.

Thursday, December 23, 2010

Cheesemonger's Mac and Cheese


If being home for the holidays had a flavor, it would be warm macaroni and cheese dropped off at your house while you were napping.

When Leigh Ann and I were staying at Mom's for Thanksgiving, our friend Va. stopped by with some hot-out-of-the-oven farfalle and cheese she'd made for her great-granddaughter. Va. didn't think it was much to fuss over. We gobbled it up faster than she could say "welcome home" and practically licked the bowl.

Later, I insisted Va. tell me how she'd made it. "Oh, it was nothing," she insisted. "Just the usual white sauce...though I did use some heavy cream. And the cheese was some Asiago and Parmesan I had left in the fridge." The fact it had those strong cheeses probably explains why the toddler didn't love it, but the grown-ups did.
Anyway, I've had mac and cheese on my mind since then and decided to make some yesterday to serve my aunt and uncle when they arrived from Tallahassee.

Cheesemonger's Mac and Cheese
Bon Appetit, September 2007
(The recipe is from the owners of a cheese store in Providence, Rhode Island. They note one should use local, artisan-style cheeses if possible. However, I think Gruyere is expensive enough without getting artisan-style Gruyere.)

1 1/2 cups coarsely grated Gruyere cheese
1 1/2 cups coarsely grated sharp cheddar cheese (about 6 ounces)
1 1/2 cups diced rindless Brie (cut from 1-pound wedge)
5 tablespoons butter, divided
1/4 cup all purpose flour
2 teaspoons chopped fresh thyme leaves (I just used about 3/4 teaspoon dried)
3/4 teaspoon (scant) nutmeg
4 cups whole milk

1 3/4 cups fresh breadcrumbs made from crustless French bread (I think the storebought crumbs are much denser than fresh/homemade, so if you use those as I did, keep it closer to 3/4 cup)

1 pound penne pasta

The recipe recommends placing the Brie in the freezer for 15 minutes to firm it before you remove the rind and dice it. I still found this prep step to be a major pain in the butt.
Mix all cheeses. Set aside one cup for topping.
Melt 4 tablespoons butter in large saucepan over medium heat. Add flour and stir until mixture turns golden brown, about 4 minutes.
Add thyme and nutmeg. Gradually whisk in milk. Simmer until thickened and smooth, stirring often, about 4 minutes. (For some reason, it took way longer than this. Maybe my heat was too low? I finally cranked it up.)
Add cheeses from large bowl. Stir until melted and smooth.

Melt 1 tablespoon butter in heavy large skillet over medium-high heat. Add breadcrumbs; toss. Stir until golden, about 2 minutes. Transfer to plate.

Preheat oven to 375. Cook pasta in boiling salted water until tender but firm to bite. Drain.
Transfer to large bowl. Pour cheese sauce over; toss. (The recipe tells you to divide this among eight 1 1/4-cup custard cups, but I just put it all in a two-quart casserole.) Sprinkle with 1 cup cheese. Sprinkle with breadcrumbs. (Oops, I did that backwards. Oh, well.)
Bake pasta until it begins to bubble and tops are golden, about 20 minutes.
We had it with pork loin (marinated in white wine, garlic and mustard), roasted asparagus, and a spinach salad with green apple, craisins and spiced pecans (courtesy of my friend Anne). Great meal! But I think it would have been even better if I'd followed Va.'s lead and done the Asiago and Parmesan instead of the Brie and Gruyere. To be continued...

Sunday, December 19, 2010

Fast and Healthy: Mirin-Glazed Salmon

This is one of my weeknight staples from Nigella Express. I absolutely love it because it has incredible flavor that is elegant enough to serve to guests...but easy enough for weeknight simplicity.

You can keep the ingredients on hand (I love buying the two-packs of frozen salmon fillets) and just defrost the salmon in the fridge the day you want to have it (or thaw under running water if you're less prepared).

For the marinade:
1/4 cup mirin (Japanese sweet rice wine...available at specialty stores but also likely found on the ethnic aisle of your regular grocery)
1/4 cup light brown sugar
1/4 cup soy sauce
4 4-oz pieces of salmon, cut from the thick part of the fillet so they are narrow but tall rather than wide and flat*
2 tablespoons rice vinegar
1-2 scallions, halved and shredded into fine strips

*this is Nigella's note, but I say just adjust the cooking time accordingly if you have thinner pieces

1. Mix the mirin, sugar and soy in a shallow dish that will hold all 4 pieces of salmon, and marinate the salmon in it for 3 minutes on the first side and 2 minutes on the second.

2. Cook the salmon in the hot, dry pan for 2 minutes and then turn it over, add the marinade and cook for another 2 minutes.
 3. Remove the salmon to whatever plate you're serving it on, and add the rice vinegar to the hot pan.

4. Pour the dark, sweet, salty glaze over the salmon and top with the scallion strips. Serve with rice or noodles as you wish, and consider putting some sushi ginger on the table too.

Serves 4.
As you can see, I made only two servings, which doesn't mess up the recipe at all and leaves you extra sauce. I like it with brown rice (this is a GREAT thing to buy in the frozen food section, IMHO -- or freeze it when you have the 40 minutes to cook it if you're feeling really crafty and clever) and edamame. And I nixed the scallions, since that's the one thing that needs to be fresh. 

Yummo -- add this to your 2011 rotation when you're working off the holiday pounds!  

Sunday, December 12, 2010

Eddie Boo's Brunswick Stew


I love to make edible holiday gifts. While most of us don't need another picture frame, candle or ornament, we can all use something yummy to eat! Giving someone a night off from cooking is my idea of a real present.

Obviously you want to make something that can easily be prepared in bulk. While I have in the past turned my kitchen into a lasagna factory, this year I decided to try something new: Brunswick Stew. It's tasty on a cold winter night, and all you really need is some cornbread to make it into a complete dinner.

My friend Suzanne's dad, Ed, is known to friends as Eddie Boo. His recipe is printed in Flavors of Home: Recipes from the West Gadsden Historical Society. There were a few more recipes I considered, but (a) I know Mr. Ed better, so I want to make his, and (b) the versions by Patsy Pitts and Mrs. Effie Clark both use measurements that confused me. What is1 1/2 quarts of potatoes or 1 quart of tomatoes? Fresh tomatoes or canned? I was searching for a pencil to figure out how many ounces would be in three pounds of cooked meat.

Plus Mr. Ed's recipe helpfully said it makes about four gallons, so I knew I'd get a lot for my trouble. Here's the recipe:

Brunswick Stew
From the back yard of Ed Spooner

6 cups chicken, boiled, boned and shredded
6 cups smoked pork (Boston butt), smoked and shredded
2 cups roast beef or venison, boiled, boned and shredded
3 14 oz. cans minced tomatoes
3 14 oz. cans whole kernel corn
2 15 oz. cans mixed vegetables
2 11 oz. cans Mexi or Fiesta corn
2 cups potatoes, peeled, medium diced and boiled
1 large onion, medium diced
1 32 oz. bottle ketchup
1 8 oz. bottle Heinz 57 sauce
Hot sauce to taste
Salt and pepper to taste

Mix all ingredients together in large pot and simmer over low heat for 4 to 5 hours. Makes about 4 gallons.

My first problem was getting a big enough pot, but I finally ended up borrowing one from the church kitchen.
I started yesterday, but that really just included shopping for ingredients and containers. This seemed like a project made for Costco, so that's where I got the meat. I purchased a bulk package of 15 chicken thighs (dark meat always tastes better in recipes like this); two packages of smoked, shredded barbecue (2 pounds each); and a package of pot roast (doesn't say how much...thumbs down to you, Morton's of Omaha). The pot roast was the closest I could get to the prescribed cooked roast beef or venison. I actually had to scrape off the gravy on the pot roast, but I think it will be fine.

Yesterday I boiled the chicken thighs and refrigerated them overnight. Today I came home from church (with the pot!) and got started.

I boiled the potatoes separately while I was chopping up the meat and throwing everything else in the big pot.

As my friend Anne and I learned when we made cassoulet a few years ago, there is really nothing yummy about a bunch of pictures of meat, but I cannot resist the urge to document this. So, here's the chicken...
Turned out I only needed one package (two pounds) of pork, so I froze the other package for later. Hmm, maybe Miss Effie is on to something with those measurements in pounds?
And the beef...the package was also more than the two cups I needed, so I'm saving the extra to put into vegetable beef soup later this week.
Note that I chopped these, and the recipe said they should be shredded, but I was pretty sure 4-5 hours of cooking would turn everything to shreds anyway.

Here's the pot o' meat...
And here are the rest of the ingredients. What's not to like about a recipe that calls for a whole bottle of Heinz 57? You should really get yourself some of that and blast back to the '80s. (Note: follow the ingredient list, not the photo...long story. Someone has trouble doing math at the grocery store.)
Then it all went into the pot...
And this is what it looked  like when I first started.
I stirred it religiously for hours and made sure to scrape the bottom of the pot--all I needed was for this big ol' pot to scorch! I also went low and slow on the heat for that reason. I figured more time cooking was better than having to start all over.

Here's what it looked like when it cooked down. It tasted salty enough to me that I figured everyone could just add their own pepper and hot sauce.
I bottled it in quart sized glass jars (thank you, Food Lion -- apparently the "canning crowd" does not shop at Costco) and tied ribbon around the jar. It was so easy to make and such a hit that I think I may make some more!

Holiday Bling

My friend Elyse at Pretty Happy Busy just posted Pretty for the Holidays, an article full of ideas to help you get creative with your holiday accessories. She inspired me to dig into my stash of Mimi's costume jewelry and find some clip-on earrings to jazz up my shoes for a party last night.
Wearing them made me feel happy, festive and sparkly. Isn't that what the holidays are all about? I knew Mimi would be smiling if she could see her "jewels" being put to good use -- though she might have told me to touch up my scuffed shoes before leaving the house!

Saturday, December 11, 2010

Marc's Kick-Ass Oats

This one's for all you fellow cholesterol-lowering oatmeal eaters...
My friend Katie and her husband Marc enjoyed some awesome oatmeal this summer in Maine. Katie told me how to make it.

The only downside to this recipe is that it required me to purchase a number of things I don't ordinarily keep on hand. But the upside is they're all really healthy, natural wholesome ingredients that I should probably stock anyway.

Kick-Ass Oats
Follow package directions to make 4-6 servings cooked oats (not instant).
To the pot of hot oats, add the following:
  • 2 tbsp. flax seeds
  • 1 tbsp. sunflower seeds
  • 3 tbsp. dried fruit mix (golden raisins, cranberries, blueberries)
  • 1/4 tsp. cinnamon
  • 2-3 tbsp. maple syrup
  • 1 tbsp. roasted almond butter (or good peanut butter)

Mix and eat -- preferably in a happy red oatmeal bowl like mine.
A few notes: I forgot I was looking for sunflower seeds and purchased up pumpkin seeds instead. Still yummy. I also put in a good bit more of a few of the ingredients, including the seeds, the fruit and the almond butter. Couldn't find the described fruit mix, but any chopped dried fruit should work.

Obviously this isn't low cal, but these are healthy calories! A bowl of this powered me through a Saturday of holiday errands. I divided up the rest in containers to enjoy throughout the week.

Monday, December 6, 2010

Slim Pickings

Like most people, I was post-Thanksgiving leftover mode this week. Dad sent us home with a fantastic smoked turkey breast, so I ate a lot of sandwiches and defrosted some of my sweet potato sausage chowder from a few weeks ago.

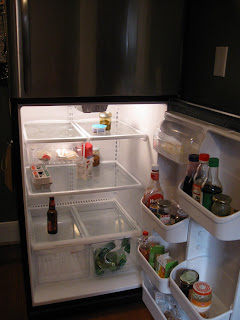
By Saturday, my fridge was looking pretty pitiful.
I picked up a few things at Earth Fare, including a crab cake. While that heated in the toaster oven, I sauteed some onion in butter, added some frozen corn and poured in a generous bit of cream. After that simmered a while, I added some frozen spinach.
Scrumptious!

Sunday, December 5, 2010

Move Over, Martha!

Note to self: December is busy enough without doing the projects you could do any time. Remember this next year. Nevertheless, there will be more visitors than usual in the condo this month, and I've been long overdue for a bedroom revamp.

My black and white toile (and gingham!) with red accents was cute, but after six years it's worn out its welcome. My sister has a habit of buying bedroom linens, so she offered me some of her castoffs. Problem was, I had a fabric-covered dressing table that matched the toile and gingham look.
When Leigh Ann and I sourced fabric last weekend, I was a little overwhelmed by the cost and options. Plus I was loath to crank back up my 1960s sewing machine (a Mimi hand-me-down). But then I had a brilliant idea: I could use sheets! It would save me a lot of sewing since the edges would be finished on some sides.

I purchased a set of king sheets in a solid to match my new linens, bought some Stitch Witch at Michael's, borrowed my aunt's staple and glue guns, and away I went...
Because the toile was glued to the top, the design was still visible even after I ripped off the fabric. I had another idea: I could use a pillowcase on top, so it would have double thickness...that way the old design would not bleed through.
I used my measuring tape to mark a piece of sewing tape at 28 and 29 inches -- 28 inches is the drop of the table, and I added in another inch for the hem. Then I used the marked sewing tape and a felt-tipped pen to mark dots to indicate my cutting and fold lines.
After my measuring and cutting, I had three different sections of the flat sheet. I pressed each one and used my iron with the Stitch Witch to make the hem. Stitch Witch is basically iron-on fabric glue. You use a damp pressing cloth and press each section with the iron for 10 seconds. Flip it to the other side, press again, and let it cool.
The ironing and cutting was the most time-consuming part of the project. Once I had the fabric panels finished, stapling them onto the table went really quickly. 

I couldn't believe how good it looked! My estimation on the panels was a bit off, so I could have had a little more fabric (with more pleats) in the front, but I told myself to give it a rest...no one else will notice. I bought some trim at Hancock Fabrics (thank goodness Calico Corners is closed on Sundays -- I'm sure it would have cost me four times as much there). Then I hot glued the trim to cover the staples.

And...voila! I think it turned out perfectly!
Total cost: $35 for the sheets and $10 for the trim. (The trim I used was actually only $5, but I bought two choices because I forgot to take a pillowcase with me to match the color.) Throw in a few bucks to buy my aunt some more staples and glue sticks, and I'm still under $50. I'm feeling very clever!